So, our objective here is to get your development environment started with Intel Quartus Prime Lite, the free version of the FPGA software that will allow you to draw circuit diagrams, write in hardware description languages, run simulations, as well as deploy your design onto say a Cyclone dev board etc. This is certainly a little more work than say setting up M$ Studio for writing a hello world programme.
This document is written on 11 May 2026. Future versions of the software may look different and have different quirks.
0. Remember, it’s normal to have issues
Unfortunately, if you are just getting started, there are a lot of things that can go wrong. Read the error messages carefully, and be patient.
Altera and Intel look confusing. Basically, Altera is a company that primarily manufactures FPGA products and design software. Intel aquired Altera in 2015 and started labelling everything with its own brand, but decided to grant it independence in 2024. As a result of this twisted history, you’ll see a lot of weird names everywhere. Don’t worry, not important.
1. Downloading an Installer
Quartus Prime comes in 3 flavours: Pro Edition (Paid), Standard Edition (Paid), Lite Edition (Free). We will focus on the Lite Edition.
Once you’ve downloaded the Quartus Prime Installer, you will realise it’s actually just a downloader (and it’s also buggy). You can download individual files, but they can also get pretty confusing because things are named a little differently. The one you will want is Quartus Prime Lite Edition Software (Device support included).
1.1 What components do you need?
I recommend getting the following:
-
- Quartus Prime Lite Edition (Free)
- Quartus Prime (Necessary)
- Questa* – Altera FPGA and Starter Editions (Necessary)
- Starter Edition (Necessary)
- Devices (You need to install at least one)
- Cyclone IV devices (I have a Cyclone IV board so my examples will use this)
- Add-ons and Standalone Software (Not needed)
- Quartus Prime Lite Edition (Free)
If you goal is just to run simulations, you will need at least one device support. Who knows, maybe you’ll find it fun a pick up a Cyclone board.
The add-ons and standalone software stuff is not needed if you don’t have a board and programmer.
1.2 Installation using Quartus Prime Installer (Downloader + Installer)
The downloader here is a little buggy. As I am writing this, you will need to load up a certificate or you will not be able to use the downloader, it will spit out an SSL error. This is how it works:
Step 1: Download the certificate (Reference, DL link);
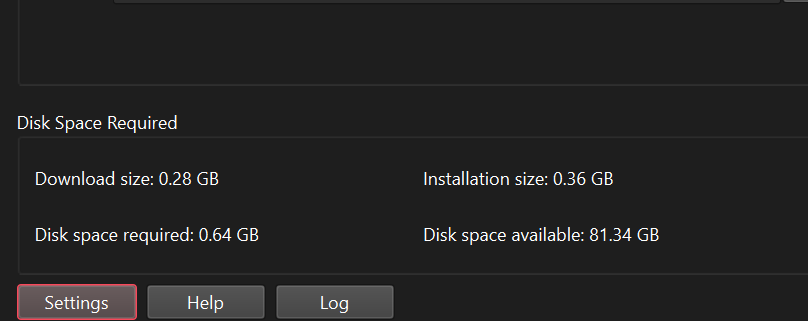
Step 2: In the installer, go to Settings (next to Help and Log, all the way in the left bottom corner);
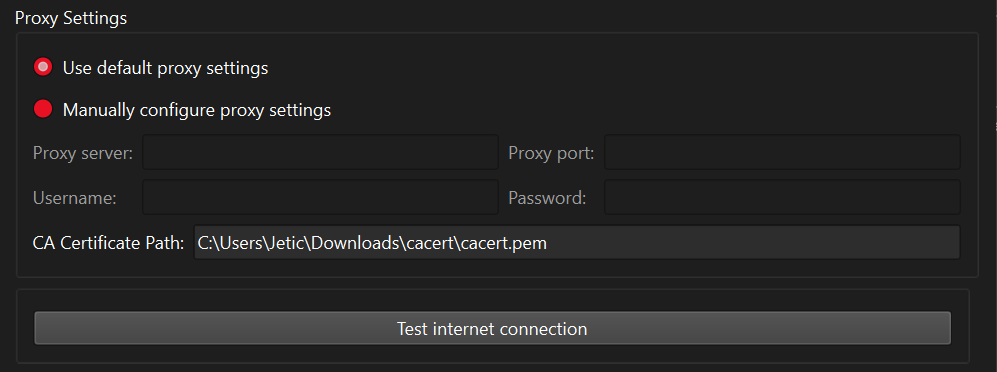
Step 3: extract cacert.zip, note the position of the certificate file (cacert.pem). Specify the location of this file after CA Certificate Path:. It’s also a good idea to click Test internet connection to see if the certificate works. If you are still getting SSL errors, you probably didn’t get the path right.
Step 4: Now that you have your SSL issue sorted, click Agree to * Agreement and Download & Install.
1.3 Installation using the complete download
The complete download should be a tar ball at the time of writing. If you downloaded .exe, it’s not the complete download. You will need to extract the entire tar ball before proceeding. Linux users, you know what to do.
For Windows users, after extracting everything you launch the installer by clicking setup.bat. A console window will show up and you’ll have to wait for a few minutes for the real installer window to show up. The most important thing is to select Questa Altera FPGA Starter Edition instead of Questa Altera FPGA Edition, the latter is paid.
1.4 I have an Apple Silicon Macbook, what do I do?
I read this article. I have not tested it, but it’s basically a linux virtual machine / emulator. Learning docker is certainly a good idea and will be useful for you in the future.
2. Setting Up A License
This is the annoying part. Good news is, you do NOT need to actually sign up online and get a license that way. Sad news is, you’ll need to setup an environmental variable for it to work. For Windows users, you don’t need Admin priviledges to do this, but thanks to M$ it’s hidden inside a dark moist corner of your legacy control panel.
2.1 Launch Quartus Prime Lite
Quartus Prime Lite is the software you will use to build circuits, compile them, as well as if you have an FPGA board deploy your work onto the board. The other piece is Questa (sometimes you’ll see people mentioning ModelSim, that’s basically an older version of this), and this is the software that comes with FPGA Starter Edition that you can use to run simulations.
If you have installed at least one device support option, you’ll be able to create and open projects. Otherwise, you’ll have to go back to Section 1 to install that. Try to create a project to see if you see any error messages.
2.2 Create a New Project
You will want to try creating a new project. As you attempt this, there is just 2 things to pay attention to: selecting the appropriate working directory, and device selection.
The default working directory in Windows is under AppData in your home folder. This is not always a good idea. You will also need to avoid any folder that is connected to OneDrive, otherwise you will see a lot of issues without proper error messages.
In the Family, Device & Board Settings page, if you are following my tutorials I will always use Cyclone IV E Family, device name EP4CE6F17I7. This is the chip I have on my board. In reality you can really use any chip you like/have, just make sure when you actually go and buy your board you get the documentations for that board including pin information, and make sure the chip family can be programmed by Quartus Lite, otherwise you may need to get a paid license. The exact device name can often be found on the documentation you get or on the chip directly.
All of the other options in the New Project Wizard are pretty normal. If you open your existing project on a different computer you may need to change the working directory and all, but that’s usually it.
2.3 Obtaining a License
Once you have created a project and it works without issues, let’s tackle the most annoying bit: licensing. Quartus Prime Lite itself works fine without needing to mess with licenses, but the moment you want to run simulations this will come up.
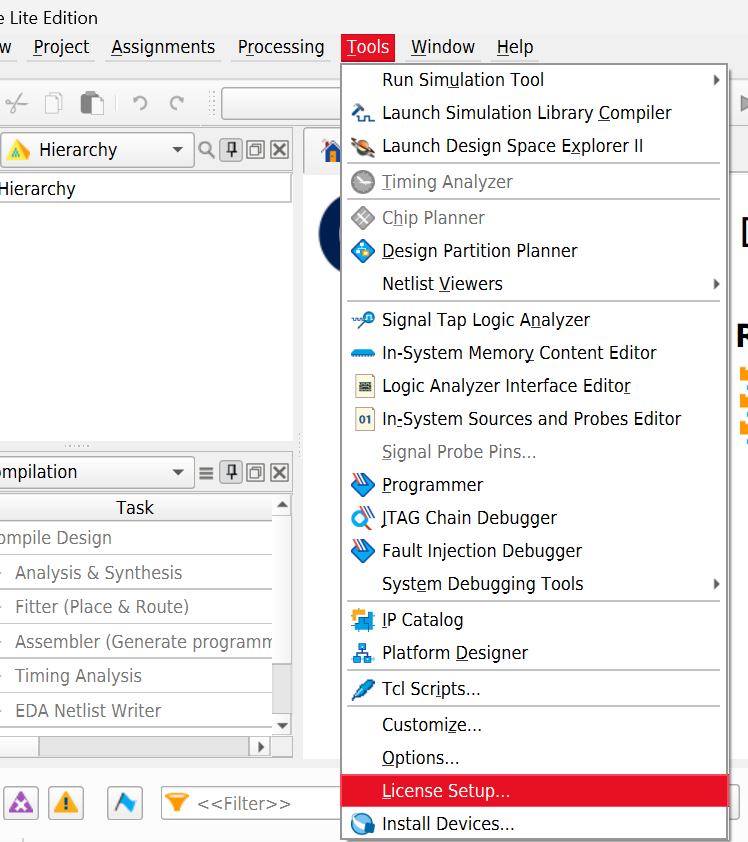
Step 1, launch the License Setup tool.
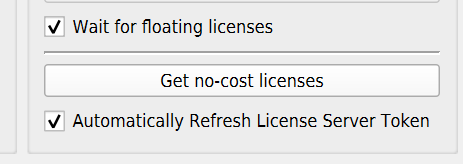
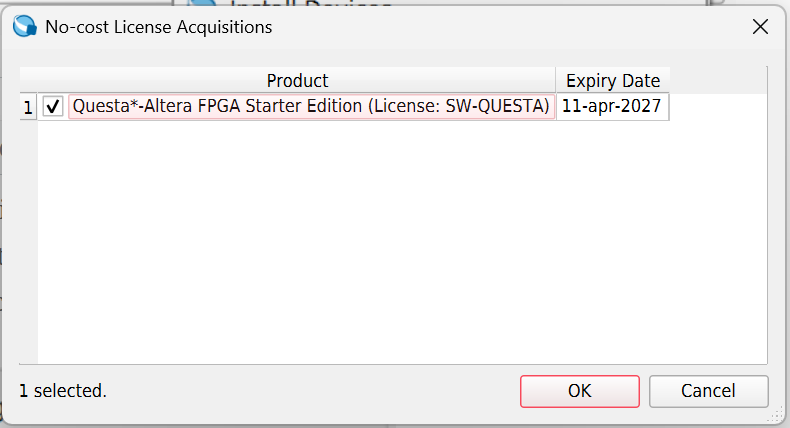
Step 2, click Get no-cost license. This will allow Quartus Prime to get you a free license and download it to your local folder. The license will be for Questa Altera FPGA Starter Edition (License SW-QUESTA) with a one year expiry date.
You’ll be able to find the location of this license file as specified by the License file textbox. The suffix of this file will be .dat , in my case it’s directly under my home directory as questa_lic.dat .
Step 3, setup the environmental variable.
Quartus Prime has this annoying bug where Questa/ModelSim/Vsim will use the wrong environmental variable to locate the license file. If you do not perform this step, you’ll get an error message when trying to run simulation like below:
Unable to checkout a license. Make sure your license file environment variable (SALT_LICENSE_SERVER) is set correctly and then run 'lmutil lmdiag' to diagnose the problem. Unable to checkout a license. Vsim is closing.
To solve this, go to the legacy control panel, and add SALT_LICENSE_SERVER with the same value as LM_LICENSE_FILE. LM_LICENSE_FILE is added by Quartus Prime Lite when you get the free license.
If you are using a shared computer (like a computer in a Lab), you will need to do this on your account, and it will only work for your account.
So, at this point, your installation is successful. Next, we’ll cover how to draw diagrams and run simulations.